Templates
Glass templates are used to create pages. They define which parts of the page are editable, and how the rest of the page should be rendered.
If you’re familiar with Django: The Glass Template language uses large parts of the Django template language, with a few features added that let designers and frontend developers build a feature-rich content management system without any backend programming.
If you’re not familiar with Django, don’t worry about it, the template language is really easy to use.
10,000-foot overview example
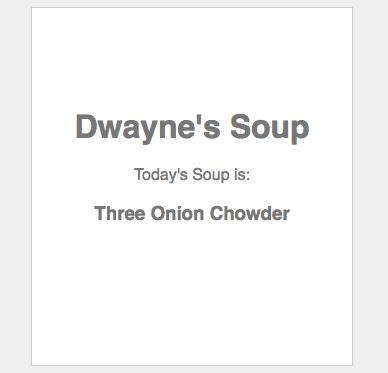
Dwayne runs a soup shop, and needs to put the soup of the day on the website every morning.
Start with a basic HTML page like the one below. If you save this page as index.html into the root directory of your site, it will work just like you’d expect a traditionally-hosted static website to work.
<html>
  <head>
    <title>Dwayne's Soup</title>
    <style type="text/css">
    html {
        background: #eee;
    }
    body {
        font-family: sans-serif;
        background: #fff;
        border: 1px solid #ccc;
        color: #777;
        margin: 10px auto;
        padding: 100px 10px;
        width: 300px;
        text-align: center;
    }
    </style>
  </head>
  <body>
    <h1>Dwayne's Soup</h1>
    <p>  Today's Soup is:</p>
    <h3>Three Onion Chowder</h3>
  </body>
</html>
Now to incorporate the CMS tools. By swapping out some of the text with template tags, we’re able to use this HTML file as a template to be populated by database content. The unique thing about this CMS is that the database fields are _defined_ with these tags. So you choose a label and a field type when you insert the tag, and it will just work without any additional development time.
We’ll now edit the html file so that the soup text can be modified by Dwayne himself.
We change out:
<h3>Three Onion Chowder</h3>
For:
<h3>{% page "soup_of_the_day" type="text" %}</h3>
If you look at the `index.html` page on the server now, you’ll see this template tag printed out on the page. So now, we need to create a new page in the CMS that uses `index.html` as a template for a database-driven page.
- Go to the ‘pages’ section of the admin and select ‘add page’ from the top of the ‘pages’ column.
- Enter the url of the page you’d like to add (leave blank for homepage), then choose the template you want to use for the page. In this case, choose ‘index.html’ as the template.
- Go back to the live site and visit the URL of the new page, followed by /admin. You’ll now see an ‘edit’ icon next to the Soup name. You can now select the text and type over it.
Templates and Pages
A Template defines which areas of the page can be edited. We made the plain HTML into a template in the last section. A page is the combination of three things:
- A location on your site (like example.com/about, or just example.com)
- A Template
- Associated Content to fill the desired template
Page Content is editable per-page.
In our contrived example Dwyane only has one page and one template. With more complex sites template and page content are both important.
Page Content is unique per-page.
Page List and List Item
You can also build galleries or a list of complex content on a page.
So far, we’ve flown-over page tags. Now we’ll look
at page_list and list_item tags.
the page_list tag is paired with an end_list tag. Everything in between these
two tags is repeated as many times as necessary for the available content (0 or more times).
The list_item tag is just like a page tag, but it is for an individual item of a list.
Let’s explore another example:
<ul>
{% page_list "archers" %}
    <li>{% list_item "name" %} - {% list_item "specialty" %}
{% end_list %}
</ul>
This may give the following output:
<ul>
    <li>Sterling - Narcissistic Super Spy
    <li>Legolas - Noodle Haired Dweeb
    <li>Mallory - All Around Tough Lady
</ul>
Anatomy of a content tag
All of the above tags have the same structure. It starts and ends with {% and %}
respectively, and in the middle it has several parts.
Tag Type
This can be page, page_list, or list_item
Tag Name
This must start with a letter and it must be wrapped in double quotes “; There should be no spaces.
Attribute Pairs
After the tag type and the name, is a list of key="value" pairs. Different types of content have different available attribute pairs. These are covered in the next section.
page_list Takes no attribute pairs.
The value is usually wrapped in double quotes, but there are some special cases.
Types of Content
Page content comes in a variety of types, like single-line text, wysiwyg (HTML), numbers, images and attachments.
All the content types can take the same varieties of type= arguments.
By convention, the type= argument should be right after the tag name, though it can go anywhere.
text
This can be specified, in order to be more explicit with type=text. It should be used for generic single line inputs.
You can specify the following other attributes which will assist the CMS in creating inputs:
- _label_ : The label for the form element. By default the label is the name.
- _placeholder_ : An HTML5 Placeholder attribute. By default there is no place holder
- _initial_ : An initial value for this field if none is set by the previous context. Think of it like a default value. If there is an initial value, the placeholder is ignored. Placeholder is a suggestion, initial is a default.
- _help_text_ : This text is presented next to the field to assist the content editors in how this field should be used.
In addition to these, the text input can also accept a maximum or a minimum length.
- _max_length_ : Integer, maximum length of this text.
- _min_length_ : Integer, minimum length.
Examples:
{% page "Adventure Name" type=text placeholder="What adventure was this" help_text="Name your adventure, e.g. 'Southeast Asia, 2007' " %}
{% page "Sky Color" type=text initial="blue" %}
wysiwyg
This field is a generic content block. It’s presented to the user as a wysiwyg input and it is rendered as HTML.
Just like the text type, wysiwyg can take label, placeholder, initial and help_text
textarea
This field is a generic plain-text content block. It’s presented to the user as a <textarea> field.
Just like the text type, wysiwyg can take label, placeholder, initial and help_text
number
This field validates to an integer.
Just like the text type, wysiwyg can take label, placeholder, initial and help_text
boolean
This field validates to a boolean (True/False) value.
Just like the text type, wysiwyg can take label, placeholder, initial and help_text
float
This field validates to a float.
Just like the text type, wysiwyg can take label, placeholder, initial and help_text
img
This field accepts an image.
With an image field you need to separate out the content block definition from it’s display.
For Example:
<!- ... ->
<div>
    {% list_item "cad_diagram" type=img %}
    <img src="{{ item.cad_diagram.url }}" data-srv-name="cad_diagram" />
</div>
You can access the following attributes of the image.
url: The URL of the uploaded image.name: The original filename of the image.size: The file size of the image.width: The original width of the image.height: The original height of the image.
You can also make one or more thumbnails of the uploaded image, right from the template. We save the resized thumbnail in memory, so we’re not keeping several copies of the same image on disk. Rather, when the cache is flushed, all of the thumbs will be recreated on page load. Here’s an example:
<img src="{{  page.content.image.url }}?width=200?height=300?crop_type=center">

That will take the original file and crop it down *to the exact size* of 200x300 pixels, with the center of the file as the focus of the crop. If you leave the ``crop_type`` and either the width or height off, the image will keep its original dimensions and resize only to the dimension specified. The options for ``crop_type`` are ``center``, ``top`` (which crops from the top left) or ``bottom`` (which crops from the bottom right).
file
This field accepts any binary attachment.
Just like an image field the display and the content block definition are separate.
For Example:
{% page "datasheet" type=file %}
<a href={{ page.content.datasheet.url }} >{{  page.content.datasheet.name }} ({{  page.content.datasheet.size|filesizeformat }})</a>

{% if item.name|endswith:".pdf" %}
You can access the following attributes of the file.
url: The URL of the image.name: The original filename of the image.size: The filesize of the image.
select
Select tags are a little complicated and get thier own section, but they should be mentioned here.
They’re used for single and multiple choice fields.
For Example:
{% page "car_make" type="select" %}
Put it all together
Let’s let Dwayne watch his soup boil and consider a little more complex example.
<html>
  <head>
    <link href="/styles.css" />
  </head>
  <body>
   {% menu "Main Nav" %}
   <nav><ul>
    {% for item in tree.children %}
    <li><a href="{{ item.url }}">{{ item.name }}</a>
    {% for child in item.children %}
        {% if forloop.first %}<ul>{% endif %}
            <li><a href="{{ child.url }}">{{ child.name }}</a>
        {% if forloop.last %}</ul>{% endif %}
    {% endfor %}
    </li>
    {% endfor %}
   </ul></nav>
    <div>
      {% page "hero_image" type="img" %}
      <img src="{{ page.hero_image.url }}" />
    </div>
    <h1>{% page "title" type="text" %}</h1>

    {% page_list %}
    <div>
      {% list_item "picture" type="img" %}
      <img src="{{ item.picture.url }}" />
      <h5>{% list_item "title" type="text" %}</h5>
    </div>
    {% end_list %}

  </body>
</html>
This is the sample template for a gallery-based site.
It includes templated navigation, a hero image and title for every gallery, and then a list of pictures with titles.
Refresh Tags
data-refresh-tag=tag_name
Important Caveats
Your template MUST have a non-empty <head> and a <body> element. A minimum acceptable template would be:
<html>
<head>
  <title>Non-Empty</title>
</head>
<body>
  <h1>Hello World!</h1>
</body>
</html>
You really should have a template named index.html otherwise we’ll sometimes have to guess which template you mean. Don’t make us do that.
File structure
In general we try to let you do whatever you want when it comes to organizing your files. However, following some general best practices will make sure things show up where they’re supposed to in the UI for your clients.
- Put all of your templates in a folder in the root directory called “templates.” Files in this folder will not be publicly accessible as static files. When you create a new page in the CMS, you’ll have the ability to choose which template you’d like to use. That list is generated from the templates directory, with a couple of exceptions:
- Anything in “templates/includes/” will not be displayed. This is where you should put partial templates.
- Any HTML files with an underscore as the first character. If you don’t want to create a folder called /includes/, you can just name your partial files _like-this.html.